Raster Image Editing
Raster Image Editing: Complete Guide + Best Software (2026)
Raster image editing means changing a picture one pixel at a time. You adjust color, tone, detail, and transparency inside a fixed grid of tiny squares. It is how photos, product shots, and scans get edited.
Almost every image you see online is a raster file. Your phone photos. Your product shots. That scanned receipt. So raster image editing is not a niche skill. It is the default way images get fixed, cleaned, and shipped.
This guide covers the whole thing. What raster editing is. Which software to use in 2026, with verified prices. How pixels actually work. A real production workflow. Plus the standards pros work to, and the quality traps that ruin most edits.
Here is the part most guides skip. We will show you why images break, not just that they break.
Quick answer: Raster image editing is the process of changing an image at the level of its individual pixels, using software like Adobe Photoshop, GIMP, or Photopea. Raster files are resolution dependent. Enlarging them past their native size cannot add real detail. It only invents new pixels.
Key Takeaways
-
-
- Raster images are grids of pixels. Vector images are math. That single difference explains everything else.
- Affinity is now free. Canva made the unified app free in October 2025.
- GIMP 3.2 landed non-destructive layers in March 2026. The biggest gap with paid rivals just closed.
- Work in 16-bit, deliver in 8-bit. That is the rule that prevents banding.
- AI upscaling does not recover lost detail. It generates believable detail. Big difference.
- Marketplaces like Amazon enforce hard image specs by machine. Miss one, and your listing gets pulled.
-
What Is Raster Image Editing?
A raster image is built from rows and columns of dots. Stack millions of them together and you get a photo. Here is the whole idea in four lines.
-
- Pixels: Images are grids of tiny colored squares, each holding one color value.
- Control: You edit individual pixels or groups of them, directly.
- Best for: Photographs, digital paintings, scanned artwork, and realistic detail.
- Drawback: Scaling an image up too far causes blur and pixelation.
Think of a mosaic on a wall. Step back and you see a face. Step close and you see tiny colored squares. That is a raster file. Editing one means changing the tiles themselves.
This is why raster graphics handle photos so well. They capture tonal gradation cheaply. Soft shadows, skin tones, sunset skies. All of it needs smooth shifts between shades. Pixel-based images do that naturally.
Remove the background from a product photo. Smooth skin on a portrait. Fix a color cast. Each of those changes individual pixels. That is raster image editing in plain terms.
The catch? Resolution dependence. A raster file holds a fixed number of pixels. Stretch it bigger and you are spreading the same tiles over more wall.
How Do I Edit a Raster Image?
Open the file in a raster graphics editor like Photoshop, GIMP, or Photopea. Make your changes on separate layers rather than the original pixels. Use masks instead of the eraser. Then export a fresh copy for each destination, keeping your layered master file untouched.
That is the short version. Here is the order that keeps quality intact:
-
-
- Duplicate the original and lock the untouched copy away.
- Open it as a 16-bit file in your chosen editor.
- Fix the whole frame first, using adjustment layers.
- Work on local areas next, each on its own layer.
- Cut out or mask the subject only after tone is right.
- Sharpen last, at final output size.
- Export a separate derivative per platform.
-
The rest of this guide explains why each step matters.
Is Raster Editing the Same as Bitmap Editing?
Yes. Same thing, two words.
Raster and bitmap both describe the pixel-grid model. A bitmap graphics editor and a raster graphics editor do the same job. People use the terms interchangeably.
One small trap. BMP is a specific file format, not a name for all bitmap images. A JPG is a bitmap image too. It just is not a .bmp file.
How to Tell If an Image Is Raster or Vector
Two quick tests.
The zoom test: Zoom way past 100%. If the picture breaks into visible blocks you can select one by one, it is raster. Vector graphics stay clean at any zoom. This is the fastest check you have got.
The file extension check:
| Raster file types | Vector file types |
| JPG, PNG, TIFF, BMP, GIF, WebP, AVIF, HEIC, PSD, RAW, DNG, CR2, NEF | SVG, AI, EPS |
One caveat. PDF and some AI files hold both types inside. So the extension alone will not always settle it.
Best Raster Image Editing Software in 2026
Most lists rank tools. We would rather help you choose.
Two things changed the market this year, and a lot of advice online is now out of date. Affinity stopped costing money. GIMP finally shipped non-destructive layers. Both facts should change what you pick.
Prices below were checked against official sources in September 2026.
Raster Graphics Software Compared
| Tool | Price (2026) | Platforms | Best for | Main limit |
| Adobe Photoshop | $22.99/mo standalone; $19.99/mo Photography plan | Windows, macOS, iPad, web | The all-round professional standard | No way to own it |
| Affinity by Canva | Free; AI needs a paid Canva plan | Windows, macOS | Free Photoshop alternative | iPad build still pending |
| GIMP | Free, open source | Windows, macOS, Linux | Free desktop power users | No native CMYK mode |
| Krita | Free; optional paid Steam build | Windows, macOS, Linux | Digital painting | Thin for photo retouching |
| Photopea | Free with ads; paid ad-free tier | Any browser | Editing PSDs online | Lags on huge files |
| Pixelmator Pro | $49.99 one-time; or Creator Studio $12.99/mo | macOS, iPad | Mac-native editing | Apple platforms only |
| Corel Painter | One-time license | Windows, macOS | Traditional-media art | Slow update pace |
| paint.NET | Free, donation-supported | Windows | Beginners and light edits | Windows only |
| Pixlr | Freemium | Browser, iOS, Android | Quick social edits | Limited advanced tools |
Adobe Photoshop: The Industry Standard
Adobe Photoshop is the raster graphics editor everything else gets measured against. The standalone app runs $22.99 a month on an annual plan billed monthly, while the Photography plan sits at $19.99 and adds Lightroom plus 1TB of storage. The full Creative Cloud Pro suite is $69.99 a month.
Photographers usually do better on the Photography plan. It costs less than the single app and gives more.
The buying argument in 2026 is Adobe’s AI moat. Select Subject and one-click cutouts lead the field. Generative Fill removes unwanted objects convincingly. Add the deepest toolset anywhere, including layers, layer masks, smart objects, and actions.
What it lacks: any way to own it. Annual plans billed monthly carry a twelve-month commitment, and canceling after day 14 triggers a fee worth half the remaining term. Read the terms before you commit.
Affinity: Now Free, and That Changes Everything
This is the biggest raster software story of the decade. Canva announced the new unified Affinity app on October 29, 2025, combining the vector, photo-editing, and page-layout tools once split across Affinity Designer, Photo, and Publisher. The core application is free, and a free Canva account is all you need to download and activate it.
The old pricing is gone for good. Affinity Photo, Designer, and Publisher V2 were discontinued at the old $69.99 per-app price, though existing owners keep their perpetual licenses.
You get non-destructive RAW editing, full layers, and strong PSD compatibility at zero cost. For most photo work, that is the whole job.
Be precise about the catch: Premium Canva AI features such as Generative Fill, Expand and Edit, and Remove Background need an eligible paid Canva plan. Canva Pro runs about $15 a month or $120 a year.
What it lacks: the iPad version is still pending, and there is no Linux build. Access is also tied to a Canva account rather than a file you own.
GIMP: Best Free Desktop Tool
GIMP is the veteran open-source image editor, free across Windows, macOS, and Linux. The 2026 hook is real and recent.
GIMP 3.2 shipped on March 14, 2026, after a year of development. It added non-destructive Link Layers that let you bring in external images and scale, rotate, or transform them without losing sharpness. A new Vector Layers feature lets the Path tool draw shapes with adjustable fill and stroke.The release also improved layer style import from Adobe PSD files and added native SVG export.
Those were long-standing complaints. They are now handled.
You get layers, masks, filters, custom brushes, batch processing, and deep Python scripting for free.
What it lacks: a native CMYK mode. Soft-proofing and RGB-to-CMYK conversion still take workarounds. Print-first designers should plan accordingly.
Photopea: Best Browser Tool
Photopea is a web-based Photoshop workalike. Open a browser, load a PSD, and the layers, masks, and smart objects stay intact. No install required.
It reads and writes PSD, XCF, Sketch, and RAW files. That makes it the rescue tool when a client sends a layered file and you are away from your desktop. The free tier is ad-supported, with a modest paid plan for an ad-free workspace.
What it lacks: performance headroom. Very large, layer-heavy files can lag badly.
Krita: Best for Digital Painting
Krita is a free, open-source raster graphics program built for painting first. Its brush engine outclasses everything else at this price, which is zero. You get hundreds of customizable brushes, stabilizers, blending modes, and texture control.
It runs on Windows, macOS, and Linux with no watermark and full animation support. The optional Steam version is identical software. Buying it simply funds development.
What it lacks: photo-retouching and prepress depth. Krita is for making art, not fixing product shots.
Pixelmator Pro: Best for Mac
Pixelmator Pro is the Mac-native photo editor, with machine-learning tools like background removal and Super Resolution upscaling.
The ownership picture shifted this year. Apple completed the Pixelmator acquisition in January 2026 and bundled the app into Creator Studio alongside Final Cut Pro and Logic Pro. Two purchase routes remain: $49.99 one time on the Mac App Store, or Creator Studio at $12.99 per month or $129 per year.Creator Studio launched on January 28, 2026, and brought Pixelmator Pro to iPad for the first time, optimized for touch and Apple Pencil.
What it lacks: Windows and Linux, entirely. The Creator Studio build also requires macOS 26 or later, while the one-time Mac version runs on older releases.
Corel Painter and PHOTO-PAINT: Best for Traditional Art
Corel’s raster pair covers two niches. Corel Painter remains the deepest simulation of traditional media in software. Oils that smear. Watercolors that bleed. Canvas grain you can feel through a tablet. It sells as a one-time license.
Corel PHOTO-PAINT is the raster half of the CorelDRAW Graphics Suite. Suite users can move between pixel and vector work without leaving the ecosystem.
What they lack: the update pace and AI features of rivals. You are buying mature brushes, not momentum.
paint.NET and Pixlr: Best for Beginners
For light edits with simple menus, two picks.
paint.NET is free on Windows and donation-supported. It offers layers, basic effects, and a large plugin library. You can learn the interface in an afternoon. It is the natural step up from Microsoft Paint.
Pixlr runs in any browser plus iOS and Android apps. The free tier handles crops, filters, and quick social graphics, with AI tools on inexpensive paid plans.
What they lack: pro-grade retouching depth, color management, and CMYK. That is fine, because it is not their job.
Is Adobe Photoshop a Raster Graphics Editor?
Yes. Photoshop is primarily a raster graphics editor working with pixel-based images. Its PSD files store pixel-based layers. It also includes vector features like shape layers, type layers, and vector masks, but most work created in Photoshop is raster by default.
That mix confuses people. The rule is simple. If a tool paints, clones, or blurs actual pixels, you are in raster territory.
How to Choose Raster Graphics Software
Five questions. One answer.
What is your main output? Photos go to Photoshop, Affinity, or GIMP. Painting goes to Krita or Corel Painter. Quick web edits go to Photopea or Pixlr.
Subscription or one-time? Free now covers most needs. Affinity, GIMP, and Krita cost nothing. Pixelmator Pro offers a one-time Mac license.
What platform? Mac only points to Pixelmator Pro. Linux points to GIMP or Krita. Anywhere points to Photopea.
What is your skill level? Starting out means paint.NET or Photopea.
Do clients send you PSDs? Then choose Photoshop, Affinity, or Photopea.
By persona: hobbyist to GIMP. Freelance photographer to Affinity. Ecommerce seller to Photoshop or an editing partner. Digital artist to Krita. Agency to Photoshop plus Adobe Bridge.
No affiliate links here. Check current pricing on each vendor’s own site. Software prices move fast, as this year proved.
How Raster Image Editing Actually Works
Four ideas explain the whole craft. Get these and everything later clicks.
The grid: Your image has fixed pixel dimensions. Say 3000 by 2000. That is your budget. You can spend it, but you cannot print more.
The channels: Each pixel stores separate red, green, and blue values. Add an alpha channel and you get transparency too.
The depth: Each channel stores a set number of levels. More levels means more room to push tones around.
The stack: Modern editors do not rewrite your original pixels. They stack instructions on top. Adjust brightness, and the software recalculates pixel values across the grid on the fly.
Miss that fourth idea and you will damage every file you touch.
Pixels, Resolution, and Pixel Dimensions
Let us clear up the most confused pair of terms in imaging.
PPI means pixels per inch. It describes a digital image. DPI means dots per inch. It describes ink a printer lays down. People swap them constantly. They are not the same.
Your real limit is pixel dimensions. A 3000 by 2000 file printed at 10 inches wide gives you 300 PPI. Print it at 20 inches and you drop to 150. Same file. Different effective resolution.
Now, the “always use 300 DPI” advice? It is folklore. The right number depends on your source and your output.
Look at what archives actually require. The NARA acceptable image quality standards set different minimums by material type:
| Capture type | Range | Recommended |
| Bitonal (1-bit) | 300 to 600 PPI | 600 PPI |
| Grayscale (8-bit) | 300 to 400 PPI | 400 PPI |
| Color (24-bit RGB) | 300 to 400 PPI | 400 PPI |
One rule surprises people. Under the FADGI Technical Guidelines, missing resolution data in the file header makes the image non-compliant. The pixels can be perfect. Bad metadata still fails you.
Bit Depth: Why 8-Bit and 16-Bit Look Different
Here is the number that makes it click.
An 8-bit channel stores 256 levels of each color. A 16-bit channel stores 65,536. That gap is your tonal headroom. It is room to push tones before the file breaks.
Push an 8-bit file hard and you will see it fail. Skies go stripey. Studio backdrops show banding. Lifted shadows turn blocky, which is called posterization. Open a histogram after a heavy Curves move and you will spot gaps. Editors call that histogram combing.
The pro rule: work in 16-bit, deliver in 8-bit.
Your camera captures 12 to 14 bits per channel in RAW. Editing in 16-bit protects that. Editing in 8-bit throws it away on step one.
One honest caveat for anyone chasing ghosts. Banding sometimes comes from your screen or your ICC profile, not the file. Seeing stripes in a 16-bit image does not always mean the image is broken.
Small accuracy note most guides get wrong. Adobe Photoshop’s 16-bit mode actually uses 32,769 values, not the full 65,536. It is still a huge jump over 8-bit.
Color Space and Why Colors Change After Upload
A color space is the map that tells software what a pixel’s numbers mean. Same numbers, different map, different color.
sRGB is the web standard. Adobe RGB and ProPhoto RGB hold a wider gamut. CMYK is for print separations and looks wrong on screen.
The rule is simple. Edit wide if your pipeline supports it. Then convert to sRGB and embed the ICC profile before you deliver.
Ever uploaded a photo and watched the colors go flat? That is almost always a profile problem. The embedded profile got stripped, was never added, or the file was Adobe RGB when the destination expected sRGB.
Amazon requires sRGB. CMYK or Adobe RGB files can display with wrong color there. That is not a style preference. It is a spec.
Layers, Masks, and Channels
Layers are why modern raster image editing is not destructive by default. Each layer holds image data or an instruction. Change one, and the layer stack recomposites.
A few terms worth knowing:
-
-
- Layer mask: Controls where a layer shows. White reveals, black hides. Fully reversible.
- Clipping mask: Limits one layer’s effect to the shape of the layer below it.
- Adjustment layer: Holds a color or tone change as a live instruction, not baked pixels.
- Alpha channel: Stores transparency data inside the file.
-
Here is the habit that separates pros from beginners. Masking beats erasing every time. The eraser destroys pixels permanently. A mask just hides them. Change your mind tomorrow and the pixels are still there waiting.
That principle drives all serious image masking and cut-out work.
Raster vs Vector Editing: The Complete Comparison
Vector graphics get built with math. Points get placed using Cartesian coordinates. An algorithm connects them and fills the color. Nothing is stored as pixels.
That is why vectors scale forever. There is no grid to stretch. Raster images store actual pixel values, so they are resolution dependent.
| Feature | Raster editing | Vector editing |
| Built from | Pixels | Mathematical paths |
| Scaling | Loses quality when enlarged | Infinite scalability |
| Best for | Photos, textures, realistic art | Logos, icons, signage |
| Detail handling | Excellent for continuous tone | Limited for soft gradients |
| File size | Usually larger | Usually smaller |
| Common formats | JPEG, PNG, TIFF, PSD | SVG, AI, EPS |
| Main software | Photoshop, GIMP, Affinity | Illustrator, Inkscape |
| Transparency | Via alpha channel | Native |
| Print at huge sizes | Depends on source pixels | Always sharp |
| Editing style | Painting on a canvas | Moving anchor points |
Now the part almost nobody says out loud.
Vectors cannot match raster graphics for gradient, tone, and shadow subtlety. You can force a vector to imitate a photo. It rarely pays off. The effort is huge and the result still looks stiff.
And real projects mix both. A brochure often uses a vector logo and raster photography on the same page. It is not an either-or fight. It is picking the right tool per element.
The quick decision tree:
-
-
- Does it need to scale to any size? Go vector.
- Is it a photograph? Go raster.
- Is it flat shapes and text? Go vector.
- Does it need soft shadows or texture? Go raster.
-
Still unsure? Build it vector, then export a raster version when you need one.
Is a JPEG a Raster or Vector File?
A JPEG is always a raster file. It stores a fixed grid of pixels, so it is resolution dependent and loses quality when enlarged. No JPEG contains vector paths. If you need a scalable version, the file has to be traced or redrawn as SVG, AI, or EPS.
Is a PNG File a Raster File?
Yes. PNG is a raster format, exactly like JPEG. The difference is compression and transparency, not structure. PNG uses lossless compression and supports an alpha channel. That combination makes it the standard for cutouts and graphics with transparent backgrounds.
People assume PNG is vector because cutouts look crisp. The crispness comes from clean edge work, not from math.
How Do I Rasterize an Image?
To rasterize is to convert a layer’s math into fixed pixels.
In Adobe Photoshop, right-click the layer and choose Rasterize Layer. For text, choose Rasterize Type. You can also use Layer > Rasterize. The current submenu covers Type, Shape, Fill Content, Vector Mask, Smart Object, Video, Layer, and All Layers.
Why bother? Some pixel tools simply refuse to work on vector or type layers. The paint bucket, clone stamp, smudge tool, and eraser all need real pixels underneath.
Myth buster: You do NOT need to rasterize to add a layer style. Drop shadow, stroke, bevel, and glow all apply to live type, shape, and smart object layers through the fx icon. Your text stays editable.
Rasterizing takes one click. Knowing when not to is the actual skill. Always keep an editable copy first.
One more thing. Photoshop has no true auto-trace. It can only build rough paths from a selection. Real raster to vector work belongs in a vector program.
Raster File Formats: Which to Edit In, Which to Deliver
| Format | Compression | Transparency | Best for | Avoid for |
| JPEG | Lossy | No | Web photos, marketplace uploads | Repeated re-saving, line art |
| PNG | Lossless | Yes | Graphics, cutouts, screenshots | Large photos on web |
| TIFF | Lossless or none | Yes | Master files, print, archives | Web delivery |
| PSD | Lossless | Yes | Layered working files | Sharing with clients |
| WebP | Both | Yes | Fast web delivery | Amazon uploads |
| AVIF | Both | Yes | Smallest modern web files | Older workflows |
| GIF | Lossy palette | Basic | Simple animation | Photos |
| BMP | None | No | Legacy systems | Anything modern |
| RAW / DNG | Lossless | No | Capture and first edit | Delivery |
Now for the idea almost no guide explains: working file vs delivery file.
You keep one master file. Layered, lossless, full color data. That is your PSD or 16-bit TIFF. From it you export derivative files sized and profiled for each destination.
Think of it like a recipe and a cake. The working file is the recipe. You can change it forever. The delivery file is the baked cake. You cannot un-bake it.
You never edit the cake. You go back to the recipe.
Generation Loss: Why Quality Drops Every Save
Here is the honest answer to a very common frustration.
Every time you open, edit, and re-save a JPEG, the file gets decoded and re-encoded. Each round drops a little quality. That is generation loss. Do it ten times and the damage stacks up.
The fix is boring and it works. Keep a lossless master. Export a fresh JPEG each time. Never save over your only copy.
Format facts worth knowing, from the HTTP Archive Web Almanac 2025:
-
-
- JPG is the LCP image format on 57% of desktop pages. PNG sits at 26%. WebP at 11%. AVIF under 1%.
- Efficiency in bits per pixel: GIF 6.7, PNG 3.8, JPG 2.0, AVIF 1.4, WebP 1.3.
- At the 90th percentile, desktop JPG files hit 274 KB. AVIF hits 45 KB for the same slot.
-
And one spec that trips up sellers constantly. Amazon does not accept WebP. Only JPEG, PNG, TIFF, and non-animated GIF.
Destructive vs Non-Destructive Raster Editing
This section matters more than the software you pick.
Non-destructive editing means every change gets stored as a reversible instruction. A layer. A mask. A smart filter. Your original pixel data stays untouched underneath.
Destructive editing writes changes straight into the pixels. Once you save and close, that is it. Gone.
Swap every destructive habit for its safe twin:
| Destructive habit | Non-destructive version |
| Eraser tool | Layer mask |
| Image > Adjustments | Adjustment layer |
| Filter applied directly | Smart filter on a smart object |
| Crop with Delete Cropped Pixels on | Crop with it unchecked |
| Dodge and burn tool | 50% gray overlay layer |
| Flatten as you go | Stamp visible on a new layer |
Here is the why, and it is mathematical.
Direct adjustments cause compounding rounding errors. One tweak might look fine. After ten revisions on the same pixels, you have quietly dragged a 16-bit file down toward 8-bit quality. Adjustment layers dodge that entirely. They never touch the source.
One studio trick worth stealing. Convert a placed image to a smart object before you scale it into your working document. The source data stays intact through every resize.
But let us be practical. Do not let workflow rules freeze you. Sometimes you need a tool that demands flat pixels. Create a stamp visible layer and work on that. Your stack underneath stays safe.
Measure twice, cut once. Old advice. Still the best editing habit there is.
The Core Raster Editing Techniques
These nine jobs make up most commercial raster image editing work. Each one has a specific failure mode.
Background removal and clipping paths: A hand-drawn pen tool path gives clean, controlled edges. Automation struggles with fine detail, low contrast, and semi-transparency. Precision here separates a real cutout from a rough one. See how a proper clipping path service handles tricky edges, or how image background removal works at volume.
Image masking for hair and fur: Paths cannot handle flyaway hair. Masking using channels or luminosity mask techniques can. The failure mode is a hard, chopped edge that screams cut out.
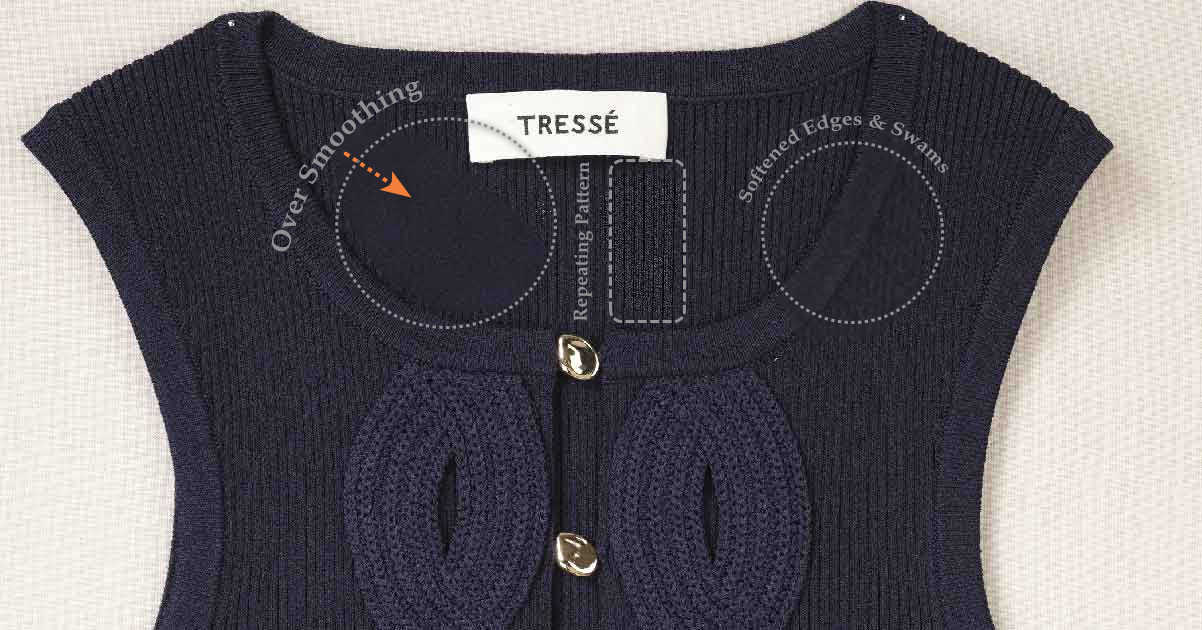
Photo retouching: The clone stamp copies. The healing brush blends. Frequency separation splits texture from tone for advanced work. The classic mistake is over-smoothing until skin looks like plastic. Our image retouching services exist because this balance is hard to hold at scale.
Color correction: Neutralize casts, then match color across a whole product range. This is where color space discipline pays off. Nothing kills trust faster than a blue shirt that photographs purple. See color correction for how matching works across a catalog.
Exposure and tone: Use Curves and Levels. Always as adjustment layers, never baked in.
Shadow creation: A natural drop shadow grounds the product. A fake one makes it float weirdly. Match the light direction from the original shot.
Sharpening and noise reduction: Order matters. Noise reduction first, sharpening last, at final output size. Reverse it and you sharpen the noise.
Resizing and cropping: More on this next. It causes more damage than any other step.
Compositing: Match perspective, light direction, and color temperature between elements. Miss one and the eye catches it instantly.
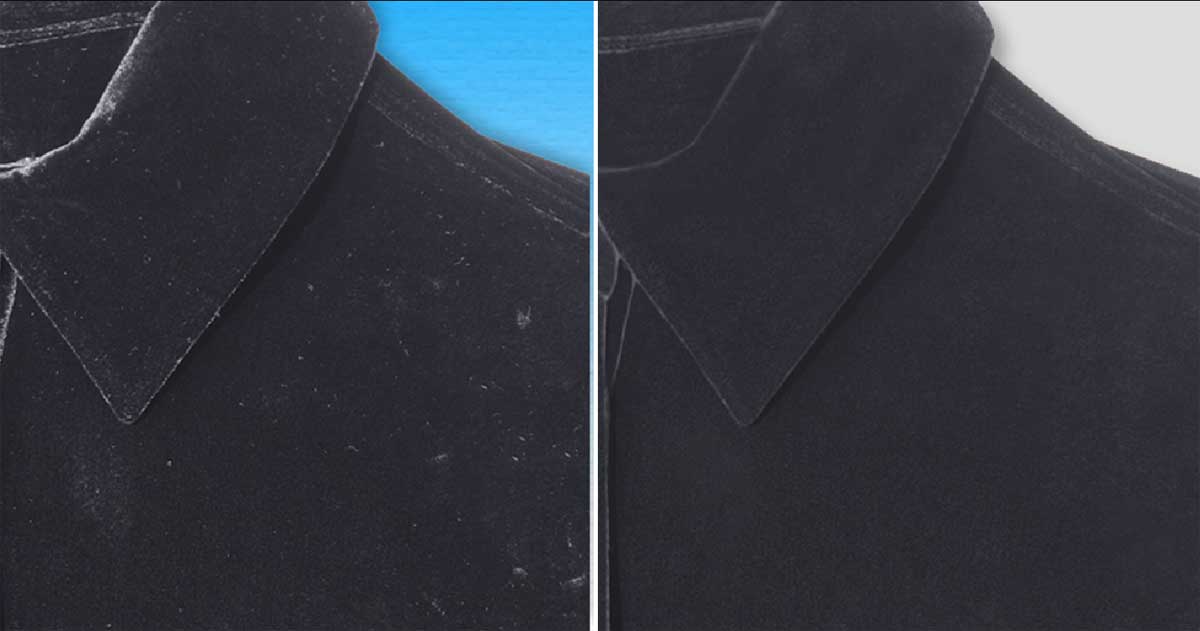
Apparel work adds its own layer of difficulty. Garments need symmetry correction and shape rebuilding, plus ghost mannequin work to show fit without a model. Editorial work has different rules again, which is why fashion photo retouching is treated as its own discipline.
The 9-Step Professional Raster Editing Workflow
Volume work needs a written process. Talent alone will not keep 800 product shots consistent.
-
- Ingest and back up: Never edit your only copy. Lock an untouched original somewhere safe. Version control starts here.
- Assess and sort: Decide what post can fix and what needs a reshoot. Be honest early. It saves hours later.
- Set up the working file: Open in 16-bit. Set your color space. Convert the base to a smart object.
- Global corrections first: Exposure, white balance, lens correction. Fix the whole frame before you touch any part of it.
- Local corrections: Retouching, dodge and burn, blemish work. Each on its own layer.
- Selection and separation: Paths, masks, background removal. Cut only after the tone is right.
- Finishing: Shadows, color matching across the set, final tone. Consistency across a catalog matters more than any single hero image.
- Quality control pass: A second pair of eyes against a written checklist. Not a vibe check. A list.
- Export derivatives: Per-destination presets. Dimensions, format, profile, compression, metadata. One click each.
FADGI defines four parts of a compliant imaging program: technical imaging parameters, best practices, conformance evaluation, and trained staff. That is a federal quality framework. It maps cleanly onto commercial work.
This is also where bulk photo editing lives or dies. A documented process is the only thing that scales.
Resizing, Resampling, and Why Images Pixelate
There are only two ways to change a raster image’s size.
Change the effective resolution. Same pixels, different output size. Safe.
Or change the number of pixels. That is resampling. And here is the fact that explains every artifact you have ever cursed at.
Resampling renders new pixels from old ones by interpolating existing pixel data. All of the resulting pixels are new. They are not the same as your original capture.
Read that twice. Upsampling adds pixels but adds zero information. It is guessing. Downsampling deletes pixels and is generally safe.
Rotation triggers resampling too. That is why straight edges can go jagged after a rotate. Almost no consumer guide mentions this.
Why Do Raster Images Pixelate?
A raster file holds a fixed number of pixels. Enlarging spreads them across a bigger area, so the software must invent new ones. Those invented pixels carry no real detail, which is why edges turn blocky.
But check your zoom level first. Viewing above 100% shows pixels naturally. If a large image breaks up below 100%, that is usually a GPU driver issue, not your file. Most people misdiagnose this.
Choosing the Right Resampling Method
Guessing here is why people try every option and still fail.
| Method | Best for | Avoid for |
| Nearest neighbour | Pixel art, screenshots, hard edges | Photos |
| Bilinear | Fast previews | Final output |
| Bicubic | General purpose | Extreme enlargement |
| Bicubic smoother | Enlargement | Reduction |
| Bicubic sharper | Reduction | Enlargement |
| Preserve details | Enlargement with edge protection | Soft, noisy sources |
| Lanczos | High-frequency detail, available in GIMP | Very small targets |
Worth knowing. Computer vision researchers picked Lanczos interpolation in published work specifically because it preserved high-frequency detail better than some neural options at low magnification. Method choice is not trivia.
Halos, Color Shifts, and Fringing After Resizing
This is the complaint that fills forums. You resize, and grays turn black. A pale edge halo appears around your subject.
The cause is interpolation across high-contrast boundaries. Usually paired with sharpening applied at the wrong stage.
The professional fix:
-
- Create a new empty layer.
- Set its blend mode to Darken.
- Clone onto that layer with the clone stamp.
The darken blend mode only affects the lighter halo tones. Your correct dark tones stay untouched. It is fully non-destructive. It works for colour fringing and chromatic aberration too.
The prevention rule: sharpen last, at final output size. Never before resizing.
Does AI Upscaling Really Add Detail?
Short answer. No.
AI upscaling does not recover lost detail. It generates believable detail. Those are two completely different things.
Super resolution is what researchers call an ill-posed problem. The information got destroyed at downsampling. Many different high-resolution images could match the same small input. The data is not hiding. It is gone.
Here is the part that matters most. These models optimize for perceptual fidelity, not signal fidelity. Their training rewards outputs that look real to humans. Not outputs that match the true pixels.
Picture a sketch artist drawing a face from a blurry description. The result looks like a person. It just is not that person.
Research on diffusion model upscalers is direct about it. They hallucinate textures and details that never existed in the original scene. The effect worsens under heavy degradation. Researchers are now building uncertainty flags for low-confidence areas.
Use AI upscaling for: web display, moderate enlargement, textures, casual use.
Never use it for: forensic work, archival reproduction, medical imaging, legal evidence, photojournalism.
Watch for these failure signs. Invented skin pores. Fabric textures that were not there. Amplified compression artefacts from a low-quality JPEG source.
Raster Editing Standards Professionals Work To
Nobody else on page one covers this. That is a shame, because it is where quality gets defined.
Archival and Government Standards
Image quality is measurable. There are published, testable criteria.
The FADGI Technical Guidelines for Digitizing Cultural Heritage Materials hit their third edition in May 2023. Earlier versions landed in 2010 and 2016. They include a star rating system for grading image quality by material type.
FADGI aligns with ISO/TC42 JWG 26, the group behind ISO 19246. That work defines metrics for cultural heritage imaging worldwide. ISO 19264 covers imaging system analysis.
NARA’s digitization rule took effect on 5 June 2023. It determined that photographs must be digitized using raster formats: TIFF, JPEG 2000, or PNG. The rule drew on FADGI guidance and ISO/TR 13028:2010. It ties back to OMB memoranda NARA M-19-21 and NARA M-23-07.
The Library of Congress, NARA, and the US Copyright Office all contributed. That is serious backing for what looks like a niche topic.
Commercial Platform Standards
Sellers face their own hard rules. Machines enforce them.
Amazon image requirements for the main image:
| Rule | Requirement |
| Background | Pure white, RGB 255 255 255 |
| Product fill | 85% or more of frame |
| Minimum size | 1,000 px longest side |
| Recommended | 1,600 px |
| Best practice | 2,000 px or more |
| Maximum | 10,000 px |
| File size cap | 10 MB |
| Color space | sRGB required |
| Formats | JPEG, PNG, TIFF, non-animated GIF |
| Not accepted | WebP |
| Layers | Must be flattened |
| Prohibited | Text, logos, watermark, badges, borders |
Automated scanning catches near-white backgrounds. Even RGB 250, 250, 250 can get flagged. Below 1,000 px, zoom functionality turns off, and zoom drives conversions. Sellers who need this handled at volume usually route it through Amazon photo editing rather than fighting the checker.
Shopify, eBay, Etsy, and Google Merchant Center each run their own rules. Build one master file. Export a preset per platform.
So what actually separates an amateur from a pro? Not talent. A written, checkable spec.
Ethics, AI, and Content Credentials
Where the Line Sits
FADGI wrote down something most people only argue about: what counts as fair editing.
| Generally acceptable | Generally not acceptable in faithful reproduction |
| Contrast adjustment | Colorization |
| Brightness adjustment | Color restoration |
| Dodging | Digital infill |
| Burning | Excessive cropping |
| Spotting | Over-sharpening |
| De-saturation and blurring | |
| Removing stains, dust, scratches in the original | |
| Adding, removing, or changing image details |
The core principle is clean. A digitized image should show the original as it looks now. Not as it might have looked when new.
But context sets the standard. An archival scan, a news photo, a product listing, and an ad composite play by different rules. Removing dust from a product shot is normal commercial photo retouching. Removing a stain from a historical document is falsification.
Both statements are true. The difference is purpose.
Content Credentials in 2026
C2PA stands for the Coalition for Content Provenance and Authenticity. It launched in February 2021, founded by Adobe, Arm, BBC, Intel, Microsoft, and Truepic. It merged the Content Authenticity Initiative with Project Origin.
By January 2026 it passed 6,000 members and affiliates.
What is live now: Adobe writes Content Credentials automatically across Creative Cloud, including Photoshop, Adobe Lightroom, and Adobe Firefly. Leica shipped the first C2PA camera in 2023. Samsung Galaxy S25 and Google Pixel 10 now sign natively. Canon moved C2PA capture into newsroom use. In February 2026, Camera Bits confirmed Photo Mechanic is adding support.
One workflow gotcha: Adobe Lightroom Classic applies Content Credentials on JPEG export only. Not TIFF, PSD, or RAW.
Why now: EU AI Act Article 50 enforcement begins August 2026. It requires machine-readable disclosure on AI-generated content. California SB 942 took effect January 2026. CISA recommended content credentials in a January 2025 advisory. The Library of Congress launched a C2PA community of practice in July 2025.
The honest limit: Signing runs ahead of verification. Many uploads, screenshots, and platform transforms strip or break the provenance metadata. Signed work often reaches viewers with nothing attached.
What this means for you: Know which export paths keep credentials. Keep a signed master. Disclose AI editing where the context demands it. Do not assume the metadata survives the trip.
Why Raster Image Editing Matters for Ecommerce
Three business outcomes. All decided at the pixel level.
Images drive the decision.
-
- 56% of shoppers explore product images first on a product page (Baymard Institute)
- 42% use images to judge physical size (Baymard Institute)
- 77% say high-quality images and video matter to their purchase (Salsify, 2025)
- 25% of ecommerce sites still lack enough image resolution or zoom (Baymard Institute)
Bad images cause returns.
-
- 71% of shoppers have returned something because it did not match the description (Salsify, 2025)
- Online return rates hit 16.9% of total retail sales in 2024 (NRF / Happy Returns)
- That is roughly $890 billion in returned goods in the US alone
Heavy images cost you speed.
-
- Median home page in 2025: 2.86 MB desktop, 2.56 MB mobile (HTTP Archive)
- Images are the single heaviest resource type on both
- Median mobile page weight grew from 845 KB in 2015 to about 2,362 KB in 2025
- Median desktop homepage carried 1,054 KB of image bytes (2024)
Images are the largest slice of Core Web Vitals pain for most stores. They are usually the Largest Contentful Paint element too.
Every one of these numbers traces back to edge quality, color accuracy, correct dimensions, and smart compression. That is raster image editing doing quiet revenue work. It is also why ecommerce product photo editing is a revenue function, not a design chore.
Common Raster Editing Mistakes and How to Fix Them
Real problems. Real causes. Real fixes.
-
- Image looks pixelated on screen: Check your zoom level first. Above 100%, you are seeing pixels because you asked to. If a large image breaks up below 100%, that is a GPU driver issue, not your file.
- Quality drops every time you save: That is generation loss from repeated lossy compression. Keep a lossless master. Export fresh derivatives. Stop saving over the same JPEG.
- Colors shift after export or upload: Missing or wrong ICC profile. Or Adobe RGB or CMYK where sRGB was expected. Convert to sRGB. Embed the profile.
- Halos or fringing after resizing: Interpolation across contrast edges, plus sharpening at the wrong stage. Use the Darken clone repair. Sharpen last.
- Banding in skies and backdrops: Heavy tonal edits in 8-bit. Move to a 16-bit working file. Check on a calibrated display before blaming the file.
- Target size is tiny and nothing looks right: Below a certain pixel count, no resampling method saves you. It becomes manual pixel work. That is the honest answer.
- Marketplace listing rejected: Off-white background. Wrong color space. Unsupported format. Unflattened layers. Product under 85% fill. Text or watermark on the main image.
- Edges look cut out and fake: Automated selection on fine detail. Fix it with manual path or mask work.
- Sharp in one app, soft in another: Low-resolution proxy previews or export settings. Confirm the full-resolution file finished loading before you judge it.
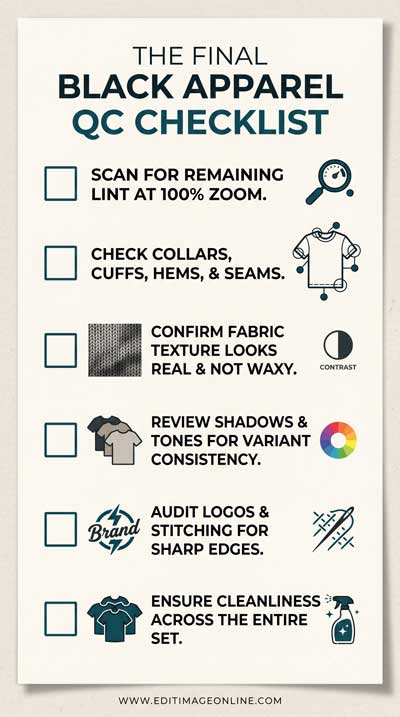
The R.A.S.T.E.R. Quality Control Checklist
Four stages. No guessing. Run every file through these six gates before delivery.
R is for Resolution. Correct pixel dimensions. Resolution present in the file header. Correct bit depth.
A is for Alignment. Crop is right. Product fill meets the platform rule. Framing is consistent across the set.
S is for Sharpness. Sharpened at output size. No halos. No over-sharpening on edges.
T is for Tone and color. White balance neutral. Color matched across the range. Correct color space embedded. No banding.
E is for Edges. Clean cutouts. Natural transparency. No fringing. Hair and fur look real.
R is for Rendering. Right format per destination. Flattened where required. Metadata correct. Naming convention followed. Master file archived.
Print it. Tape it above the monitor. A checklist beats a good eye on tired days.
Free download, no email required
Two files. Print one, work in the other.
- R.A.S.T.E.R. QC Checklist (PDF, 2 pages). All six gates, 27 checks, plus the Amazon spec, export presets, and a batch sign-off strip.
- QC Workbook (Excel and Google Sheets). The same checklist with Pass and Fail dropdowns, live counters, and a ready-to-ship gate. Import it straight into Google Sheets.
[Download the PDF checklist] [Download the workbook]
When Raster Editing Is the Wrong Tool
We would rather tell you the truth than sell you the service.
Logos and icons. Anything that needs infinite scalability should be vector. Build it in Adobe Illustrator or Inkscape. Export raster versions as needed.
Large-format print from a small source. Billboard from a phone photo? No. Go vector, or reshoot.
When the source is beyond saving. Severe motion blur. Extreme underexposure. A heavily compressed thumbnail. Super resolution cannot recover what got destroyed. Reshooting is usually cheaper than heroic retouching.
Evidentiary or archival contexts. Forensic, legal, journalistic, or heritage work. Stick to documented, permitted adjustments only.
Knowing the limits builds more trust than pretending there are not any.
In-House vs Outsourcing Raster Image Editing
| In-house | Outsourced | |
| Control | Full | Needs a clear brief |
| Speed at volume | Slow | Scales fast |
| Consistency | Varies without a process | Matches a written spec |
| Quality control layer | Usually skipped | Built in |
| Cost per image | Hidden in salary | Predictable |
| Setup effort | Low | Trial period needed |
| Capacity planning | Hard to flex | Flexes with demand |
Here is a rough rule. Under about 50 images a month, in-house usually works fine. Past a few hundred, the coordination cost of doing it yourself tends to overtake the outsourcing cost.
The turnaround time math is what catches people. One editor doing 15 careful cutouts a day sounds fine. Then a 900-SKU launch lands.
Let Us Handle the Pixel Work
Edit Image Online has run production photo editing since 2016. Our team of 70+ retouchers handles background removal, clipping path, image masking, ghost mannequin, color correction, and product photo editing every day. Every batch runs through a dedicated quality control pass before delivery.
Not sure yet? Start small. Send two or three images through our free trial and judge the edges yourself. You can also check transparent pricing or read more about our team.
Questions first? Reach us at info@editimageonline.com or +1 (917) 924-1010.
Raster Image Editing Glossary
Alpha channel: Extra channel storing transparency data alongside color.
Anti-aliasing: Smoothing of jagged edges by blending edge pixels.
Artefacts: Unwanted visual errors created by compression or processing.
Banding: Visible steps in a gradient that should look smooth.
Bit depth: Number of tonal levels each channel can store.
Bitmap: Another word for a raster image built from pixels.
Clipping mask: A layer that limits another layer to its own shape.
Clipping path: A vector outline used to cut a subject from its background.
Color space: The map defining what a pixel’s color numbers mean.
Compression: Reducing file size, either lossy or lossless.
DPI: Dots per inch a printer lays down on paper.
Generation loss: Cumulative quality drop from repeated lossy re-saving.
Histogram: Chart showing how tones are spread across an image.
ICC profile: Data attached to a file describing its color space.
Interpolation: Calculating new pixel values from existing neighbours.
Layer mask: Grayscale control over where a layer shows.
Metadata: Embedded file info such as EXIF, IPTC, and XMP.
Non-destructive editing: Editing that leaves original pixels untouched.
Pixel: The smallest addressable unit of a raster image.
Pixelation: Visible square blocks from too few pixels for the size.
Posterization: Loss of smooth tone into flat blocks of color.
PPI: Pixels per inch in a digital image.
Raster: An image built as a grid of pixels.
Rasterize: Converting vector data into fixed pixels.
Resampling: Changing the pixel count by generating new pixels.
Resolution: How much detail an image holds, tied to pixel count.
Smart object: A container layer preserving source data through edits.
sRGB: The standard color space for web and most screens.
Upsampling: Adding pixels to enlarge, without adding real detail.
Vector: An image defined by mathematical paths, not pixels.
Frequently Asked Questions
What is raster image editing?
Raster image editing means changing an image at the level of its individual pixels. You adjust color, tone, detail, and transparency inside a fixed grid. Common raster file types include JPEG, PNG, TIFF, and PSD. It is the standard way photos get edited.
What is the best raster graphics software in 2026?
It depends on the job. Affinity is now free and covers most professional photo work. GIMP added non-destructive layers in version 3.2 and runs on every desktop platform. Photoshop still leads on AI tools. Photopea handles PSDs in a browser with no install.
Is Affinity really free now?
Yes. Canva launched a unified Affinity app in October 2025 and made the core application free. You need a free Canva account to activate it. Premium Canva AI features such as Generative Fill still require a paid Canva plan.
What is the difference between raster and vector editing?
Raster editing changes pixel values and is resolution dependent, which suits photographs. Vector editing manipulates mathematical paths and is resolution independent, which suits logos. Use raster for realistic detail. Use vector for anything that must scale cleanly.
Can raster images be resized without losing quality?
Making them smaller is usually safe. Making them bigger is not. Enlarging requires interpolation, which invents new pixels from existing ones. All resulting pixels are new. Keep enlargement modest and check results at 100% zoom.
What file formats are raster images?
Common raster file formats include JPEG, PNG, TIFF, BMP, GIF, PSD, WebP, AVIF, HEIC, and RAW files like DNG, CR2, and NEF. TIFF and PSD work as editing formats. JPEG, WebP, and AVIF work as delivery formats.
Is raster editing the same as bitmap editing?
Yes. Both terms describe editing images made of pixels arranged in a grid. A bitmap graphics editor and a raster graphics editor do the same job. One note: BMP is a specific file format, not a name for every bitmap image.
What is the best free raster graphics editor?
Four are genuinely free and genuinely good. GIMP handles full desktop editing across Windows, Mac, and Linux. Affinity now costs nothing with a Canva account. Krita suits painting. Photopea runs in your browser and opens PSD files.
Should I edit in 8-bit or 16-bit?
Work in 16-bit, deliver in 8-bit. An 8-bit channel stores 256 levels. A 16-bit channel stores 65,536. That extra tonal headroom prevents banding and posterization during heavy edits. Cameras capture 12 to 14 bits per channel in RAW.
What resolution do I need for print vs web?
There is no single number. For web, match your display dimensions and deliver in sRGB. For print, 300 PPI at final print size works as a baseline. NARA recommends 600 PPI bitonal, 400 PPI grayscale, and 300 to 400 PPI color.
Can you convert a raster image to vector?
Yes, through vectorisation or image trace. Results depend heavily on the source. Simple high-contrast shapes convert well. Photographs do not. Photoshop has no true auto-trace and only builds rough paths from selections.
Does AI upscaling actually improve image quality?
It improves how the image looks, not what it contains. AI upscaling generates plausible detail rather than recovering lost detail. Models optimize for perceptual fidelity, not signal fidelity. Fine for web display. Never acceptable for forensic, medical, or archival work.
Why did Amazon reject or suppress my product image?
Usual causes: background is not pure white RGB 255 255 255, resolution below 1,000 px, text or watermark on the main image, product filling under 85% of frame, wrong color space, unflattened file, or an unsupported format like WebP.
How do I stop losing quality every time I save an image?
You are hitting generation loss. Each save of a lossy JPEG decodes and re-encodes the file. Keep a lossless layered master in PSD or TIFF. Export a fresh JPEG each time you deliver. Never save over your working file.
Is AI background removal as good as a hand-drawn clipping path?
Depends on the subject. Automated cut-out tools handle simple, high-contrast products fast and well. They struggle with hair, fur, semi-transparency, and reflective surfaces. A hand-drawn clipping path gives control over every anchor point.
Final Thoughts
Raster image editing is not complicated. It is just unforgiving.
Every rule here comes back to one idea. Your pixels are finite. Protect them early and you will never fight them later. Work in 16-bit. Keep a lossless master. Mask instead of erase. Sharpen last. Export to spec.
Do that, and the frustrating stuff mostly stops happening. Pretty good trade for a few habit changes.